Register Participant Information
My first steps
Create a Diggle
Question types
Present live
Invite participants
Results & Reports
Collaborate with others
AI - Diggle Buddy
Company Workspace
Account and settings
GDPR
Security
FAQ & Troubleshooting
- Join code has expired
- How do I use Diggle for remote learning and surveys?
- My QR code isn´t displaying
- Presentation screen is not displayed
- The leaderboard isn’t calculating scores correctly
- How do I recover a deleted Diggle or session?
- My participants are seeing the wrong slide
- How do I use Diggle for remote learning and surveys?
- How to switch between numbers and percentages
- How to interact with the result layouts
Table of Contents
Register Personal Information (RPI)
The Register Participant Information (RPI) feature is a Pro and Enterprise feature that allows you to collect detailed information about participants upon joining a Diggle session. This information can include email, names, roles, and other custom fields relevant to your session. Detailed participant information is invaluable when analyzing results, creating reports, and distributing results to different groups, allowing for more targeted insights and actions.
Step-by-Step Guide to Register Participant Information (RPI)
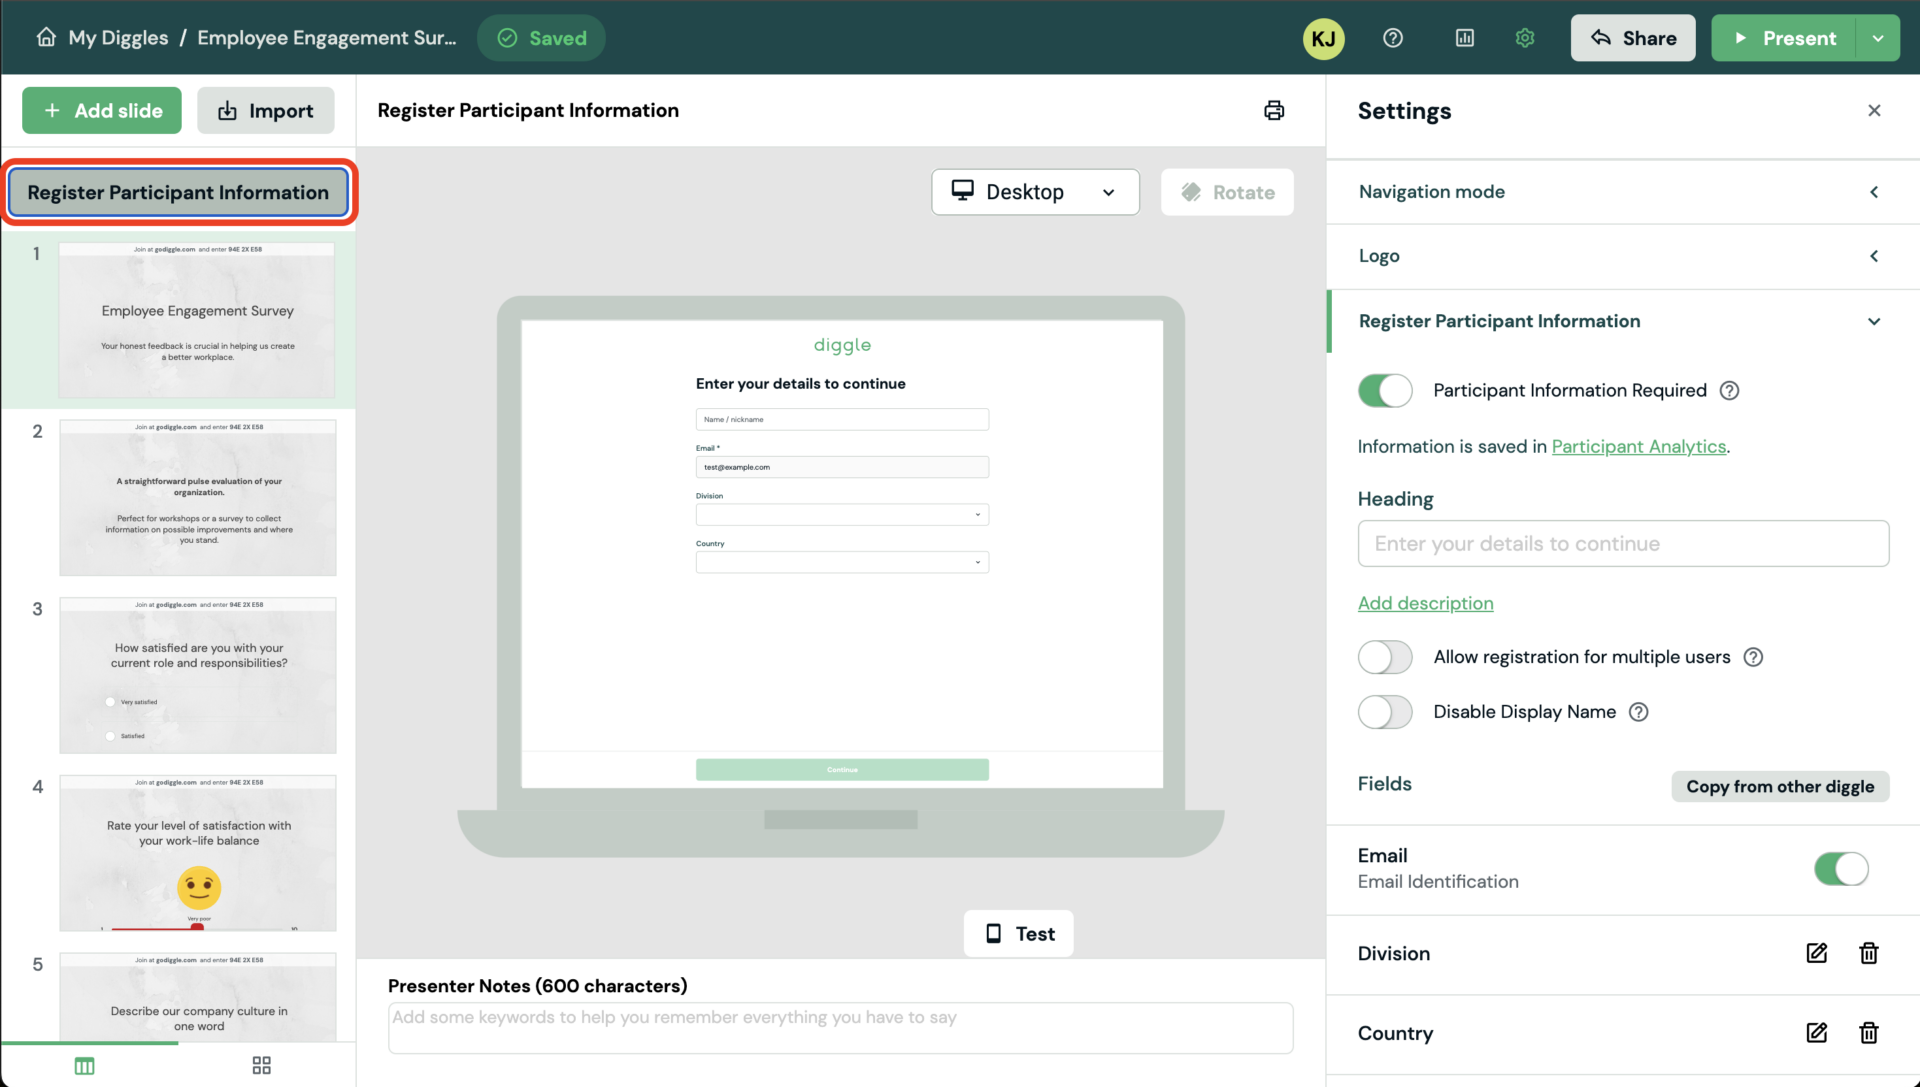
Accessing the RPI Feature
Go to the “My Diggles” page by double-clicking the Diggle for which you want to register participant information. Click the “Settings” button in the top right of your screen, next to the Share button. In the settings menu, select “Register Participant Information” and toggle the button to activate RPI for the Diggle.
Setting Up RPI Fields
Use the “Heading” field to welcome the participants and let them know they must enter the information required to continue.
You can add a field to write a longer message that motivates and explains why you are asking these questions. Open the text box by clicking the “Add description” button underneath the Heading. This can help participants understand the importance of providing accurate information and how it will be used.
If needed, toggle the “Allow registration for multiple users” switch to enable multiple participants to enter their personal information using the same device. In sessions where participants work in groups and use a single device (e.g., a PC or an iPad) to register responses in Diggle, allowing each group member to register individually is essential. This feature ensures that all participants in the group can provide their personal information and be accurately tracked, even when using a shared device.
Toggle the “Disable Display Name” switch if you do not want the participants to enter a name or a nickname upon joining the Diggle. Display names are typically used to identify each participant or group in live presentations and quizzes. The name you collect in the RPI fields does not appear during a presentation; it is only for background data collection and reports.
You can edit or delete the RPI Fields by clicking the edit icon or the trash can icon next to the field you wish to edit or delete. You can also toggle off the email identification field, but please be aware that this will limit your options of tracking participant information across separate Diggles.
If you wish to add more information fields, you can do that by clicking the “Add Field” button. Here you can either add one of our predefined fields, like Country, Organization or Division, or you can create your own custom field.
You can now customise your fields to best fit your need. You can always add a placeholder text to guide the participants on what information to provide, and you can choose whether the field is mandatory or not.
In the predefined fields or “Organization” and “Division”, you can add your own predefined alternatives that will show up as a dropdown for the participants. The default setting is two Options, but you can add as many as you need by clicking the “Add Option” button.

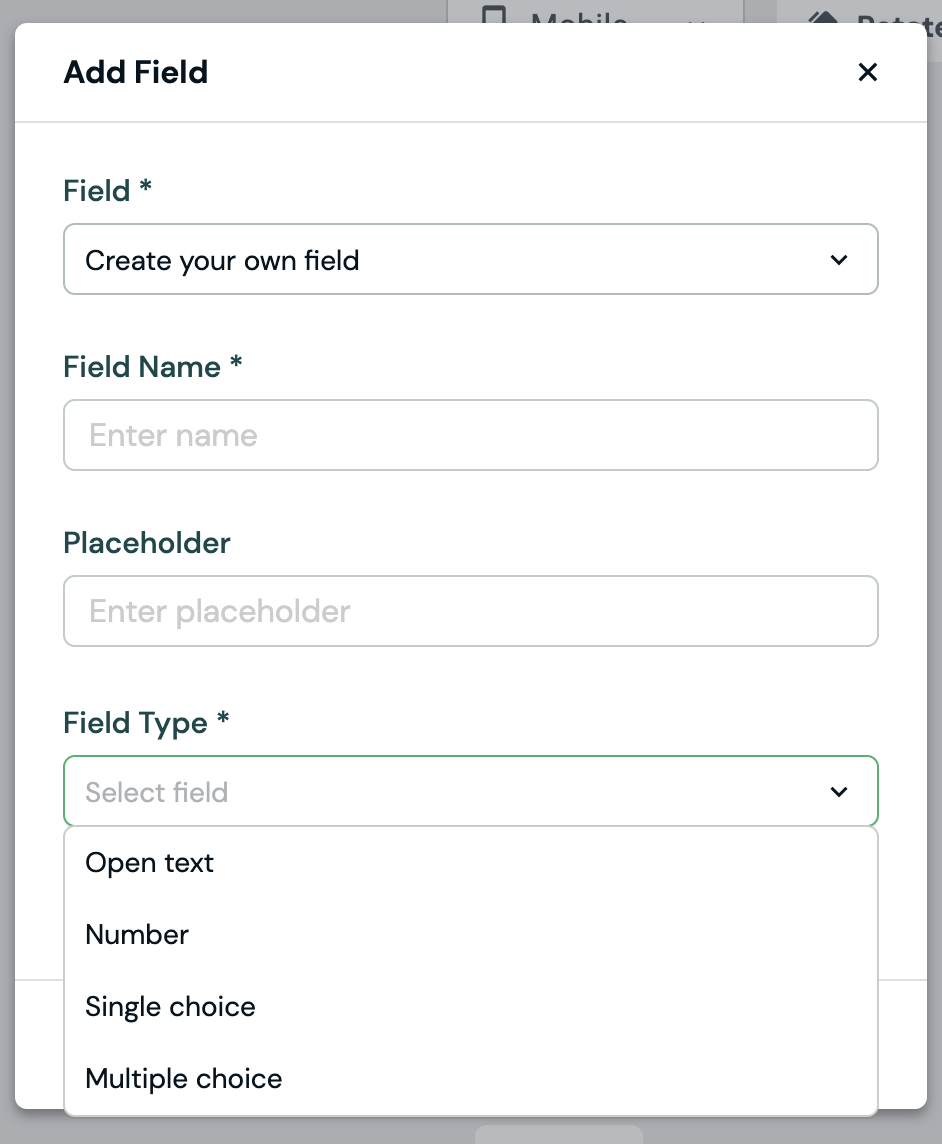
Custom fields:
Your Custom fields can be whatever you wish to collect information about, like gender, age, or position. To customise the field, begin by adding a name for it. Then, select the type of information you wish to collect from the Field Type dropdown. If you use a Single/Multiple choise field, fill in the different Options, and add more by clicking the “Add Option” button.
Select a field name for your custom field (e.g., gender, age, or position).
Select field type (Open text, Number, Single choice, or Multiple choice.), before selecting whether the field is mandatory or optional for the participants to reply to. Then, add a placeholder text to guide participants on what information to provide.
You can change the order of the fields by simply dragging and dropping them in the settings menu to ensure that the most important fields are placed at the top.
View RPI in Builder:
In the Diggle builder, the RPI will appear as a header at the top of the timeline. Clicking on the RPI header will open a preview in the middle pane, allowing you to test the registration fields.
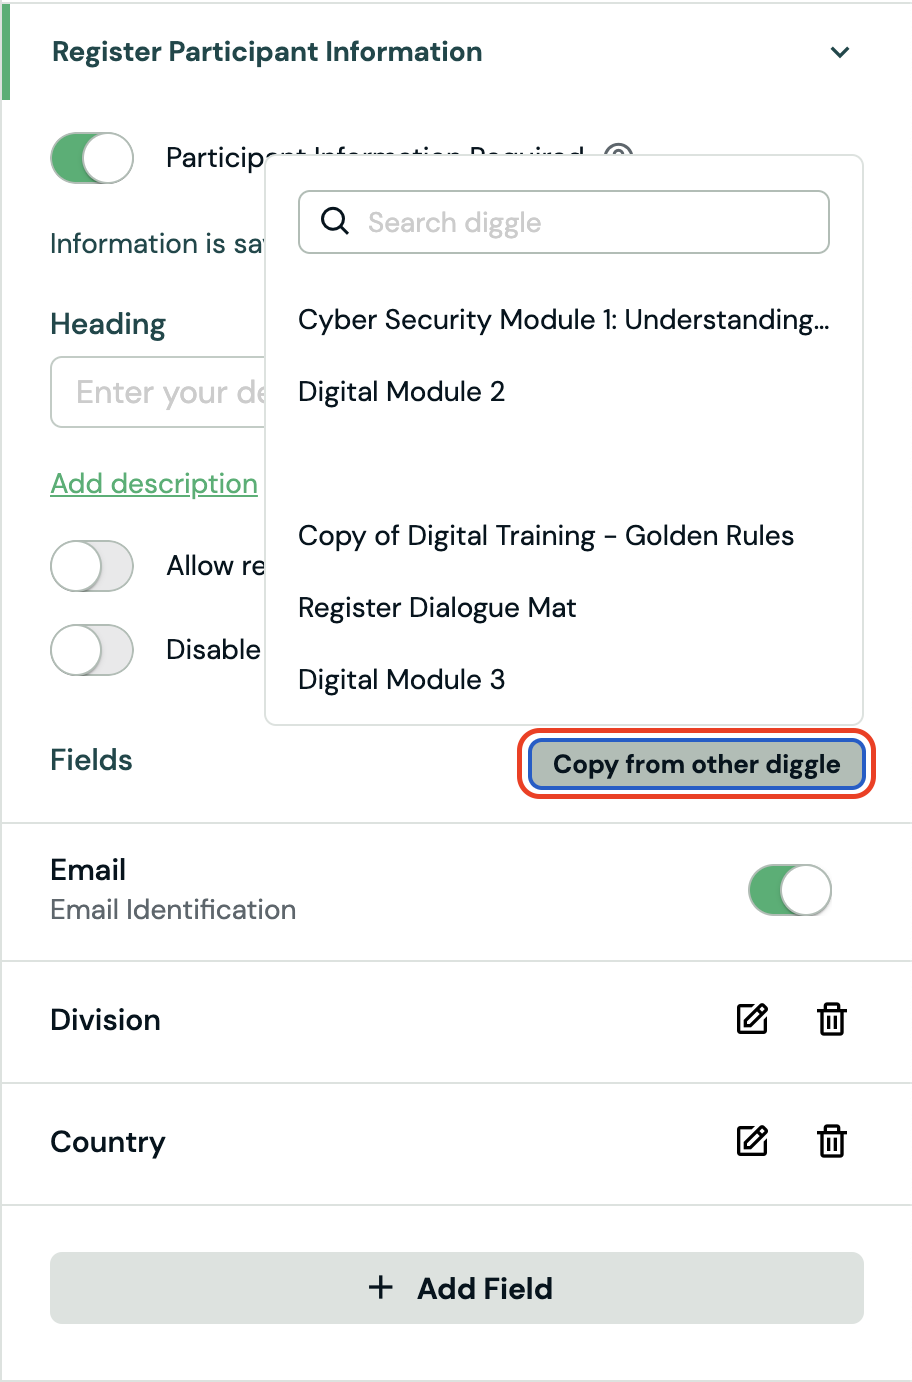
Copying RPI Information from Previous Diggles
Copy Previous RPI Fields:
When creating a new Diggle, you can copy RPI information from a previous Diggle. This is great for making sure the information you gather is the same across multiple Diggles. Start by turning on “Register Participant Information” in the settings menu, and then click the “Copy from other Diggle” button.
Select the Diggle from which you want to copy the RPI fields.
Modify Copied Fields:
After copying, you can modify the fields for the new session as needed by clicking the edit button next to the Field. Add, remove, or reorder fields to fit the specific requirements of the current session.
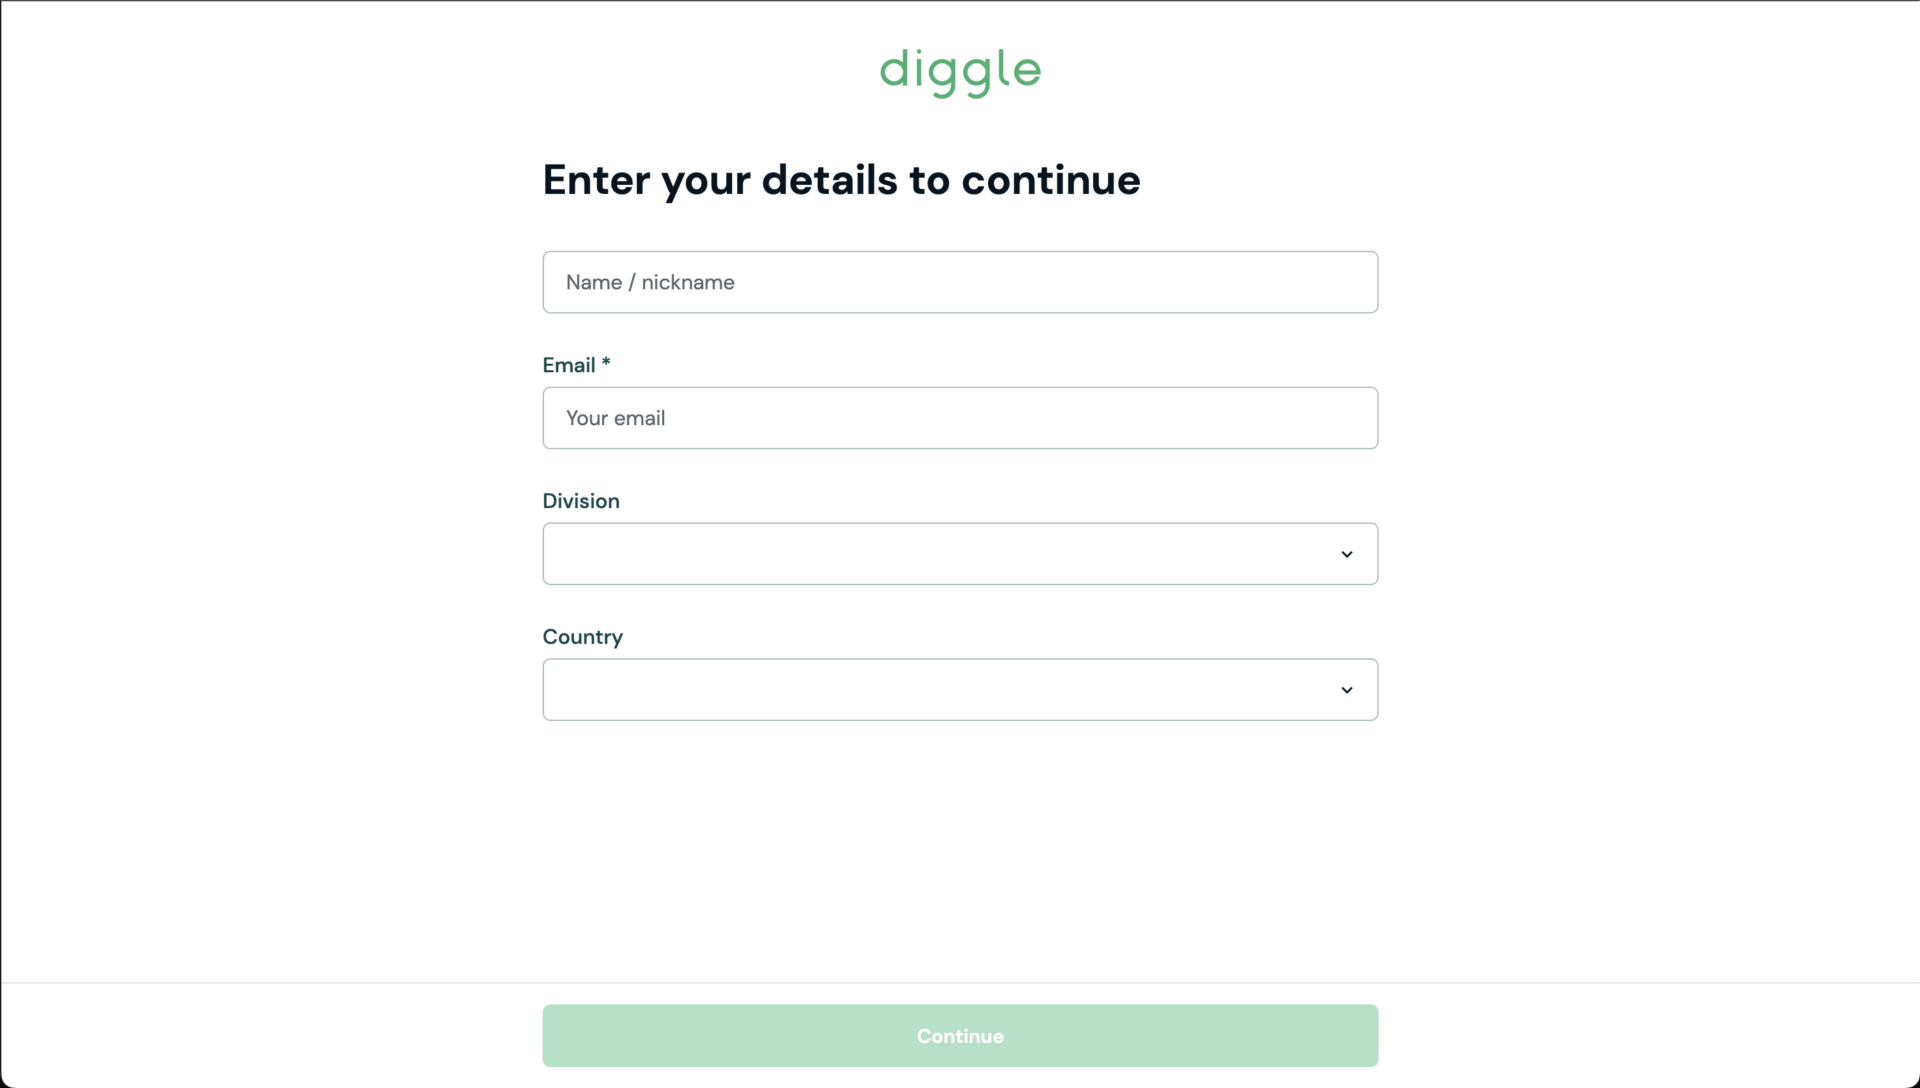
Joining a Diggle with RPI
When participants join a Diggle session:
Participants join the Diggle session by scanning the provided QR code, through the specified URL of the Invitation link, or by entering the Temporary code to join at godiggle.com.
Upon joining, participants will see a message informing them that registration is required, along with a thank you note to make the process more welcoming. This message helps reduce apprehension and explains the necessity of registration.
Please note: If people join using the invitation link, they will only read the message you provide in the Heading field.
The participants will then fill out the form the same way you have set it up in the Builder.
Finding the Participant Information data
Participant Analytics
The RPI data registered from you Diggles can be found in the Participant Analytics tab at hour home screen.
Filtering the Participant Analytics:
In the Participant Analytics page, you have access to all you RPI data from all your Diggles. To access the information you want, use the filter fields and click the Generate button to apply the filters.
Start by selecting the Diggles you wish to gain information about. If there are specific fields you want to look at as well, select then in the Fields bar. To narrow your search even further, use the Filters button below the Generate button.
You can also look at information connected to a specific participant by double-clicking on their name.
If you wish to analyze the information even further or connect it to data from other sources, click the Download button. The downloaded report will have all your filters applied. If you wish to download all your Participant Analytics, click the download button without applying filters.
Participant Analytics allows you to quickly view all participants and their overall engagement across the various Diggle sessions you have conducted. This feature is especially useful in the company workspace version for enterprises, where it includes organizational-wide data. If you want to link RPI (Register Personal Information) data to specific results in a Diggle session, use the Report functionality.