Spin the Wheel
Categorized Response is an advanced text-based question type where participants respond to specific categories with open text inputs. It organizes discussions around different aspects of a topic.
The Company Workspace is an enterprise-only feature that supports collaborative creation and presentation of Diggles across the organization. It allows you to assign user roles and control access to specific projects, making managing content creation and session delivery easier.
Think of it as a course library where some team members focus on developing materials while others can access and present pre-made content. This ensures that even those less skilled in content creation can effectively conduct training sessions using the resources in the workspace.
From your dashboard, click the dropdown menu labelled ‘Personal Workspace’ and choose your Company Workspace.
Use the sidebar on the left to select the desired project.
If no projects exist, you’ll need to create one!
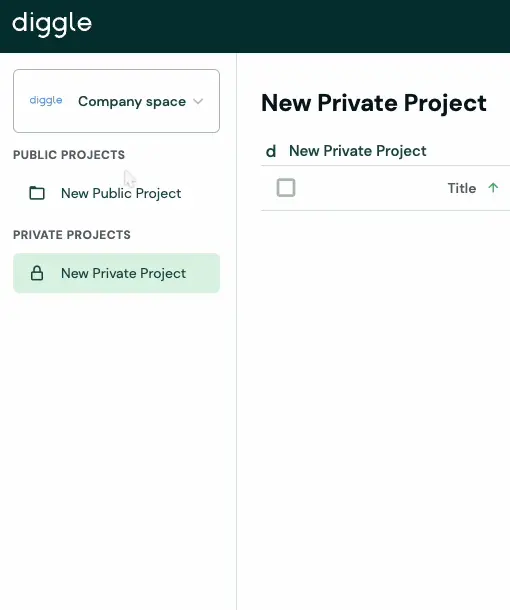
Public Projects These are accessible to everyone in the Company Workspace and are ideal for courses and Diggles intended for widespread organizational use.
Private Projects These are invite-only spaces hidden from those not explicitly invited. They are perfect for developing content or material not intended for the entire organization.
Diggle offers three user roles, or access levels, in the Company Workspace: Run Only, Author, and Admin.
Run Only This level is ideal for trainers. It allows users to access and run sessions without creating them themselves.
Authors can create, run, and move Diggles into the company workspace, building content in projects for others to access.
Admins have complete control, including managing users, setting access levels, and customizing the workspace. They are also allowed to access all results in all projects.
See company workspace settings for more details.
Running a Diggle from the Company Workspace introduces some key differences from the Personal Workspace logic:
Simultaneous sessions: In the Company Workspace, multiple sessions of the same Diggle can be run simultaneously, which is essential for organization-wide training.
Editing content live is restricted: Content changes to a Diggle won’t affect sessions already in progress. Updates apply only to future sessions, ensuring unexpected changes don’t disrupt trainers during a live session.
To apply updates to sessions with existing invite links, check out the how-to guide here.
You can create Public and Private Projects to organize and manage your content.
Creating a project
Navigate to your Company Workspace.
Click the “+Create Project” button in the top bar.
Enter your project name and choose whether it will be Public or Private.
Public projects
Accessible to everyone in the Company Workspace.
Ideal for shared content and organization-wide initiatives.
Private projects
Restricted access is visible only to invited collaborators.
Managing projects
Within your project, use the menu next to the “+Create Diggle” button to rename, delete, or manage access.
For Private Projects, you can invite or remove collaborators or convert the project to Public.
Note: Admin-level users can access all projects for administrative purposes.
You can view session results similarly to how you would in your Personal Workspace. You can access results by selecting the Diggle and session or clicking the Results tab in the left sidebar.
The difference in the Company Workspace is that access to results varies by user role:
Run Only Access results from their sessions.
Author View results from sessions they created, regardless of the presenter.
Admin Access all results across the Company Workspace.
The Participant Analytics feature is a powerful tool in the Company Workspace. Every Diggle with the RPI functionality turned on will be collected, making it possible to collect a large amount of data from across your organization.
You can read more about Participant Analytics here.
As an Admin, you will manage and adjust settings in the “Manage Workspace” tab at the bottom of the sidebar on the left of the page. Here, you can replace the workspace logo, name, and colors. The company colors set here will be available to everyone who is creating Diggles in the Company Workspace in the color picker so that the company profile will be consistent.
You can also add users by clicking the “+Add User” button. Here, you can invite people by adding their email and adjusting their access level to the Company Workspace. If you wish to edit a user already in the Company Workspace, click the menu next to the user. You can click “Edit User” to edit them, for example, to give them a different access level.
Categorized Response is an advanced text-based question type where participants respond to specific categories with open text inputs. It organizes discussions around different aspects of a topic.